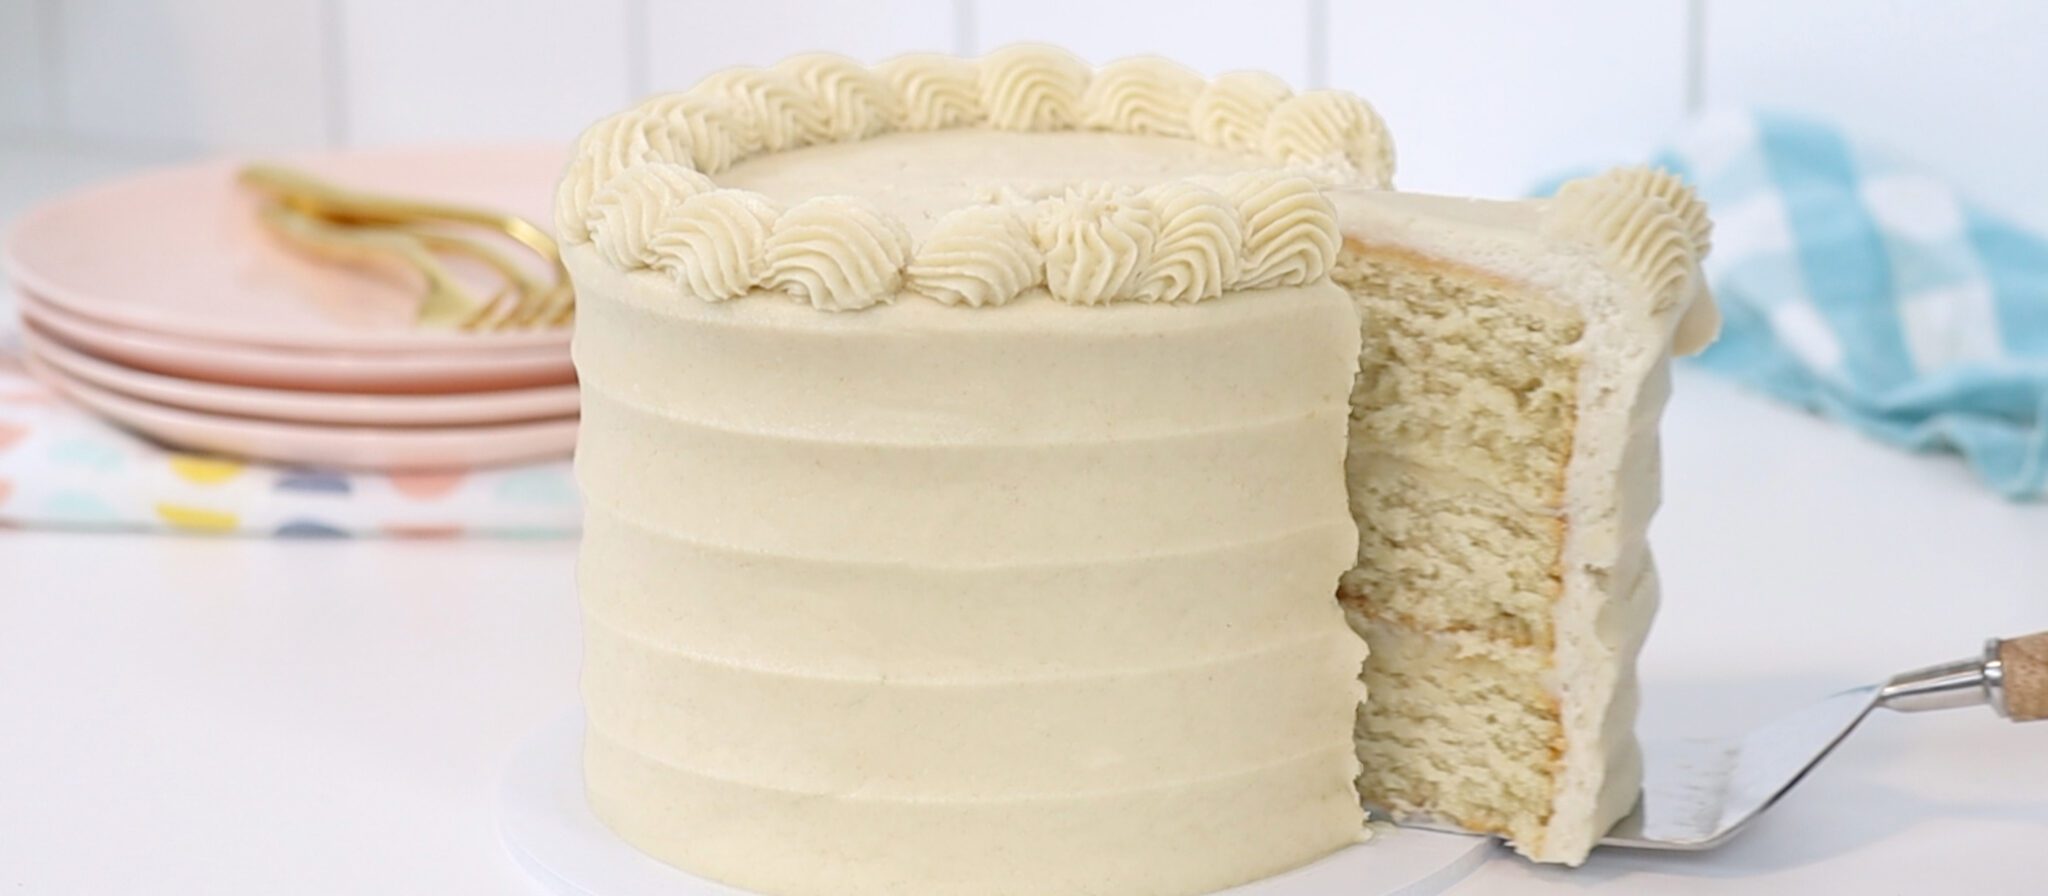
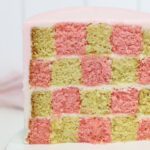
Using coconut milk in the cake layers, filling and frosting makes this deliciously rich coconut milk cake!
Make the cake layers
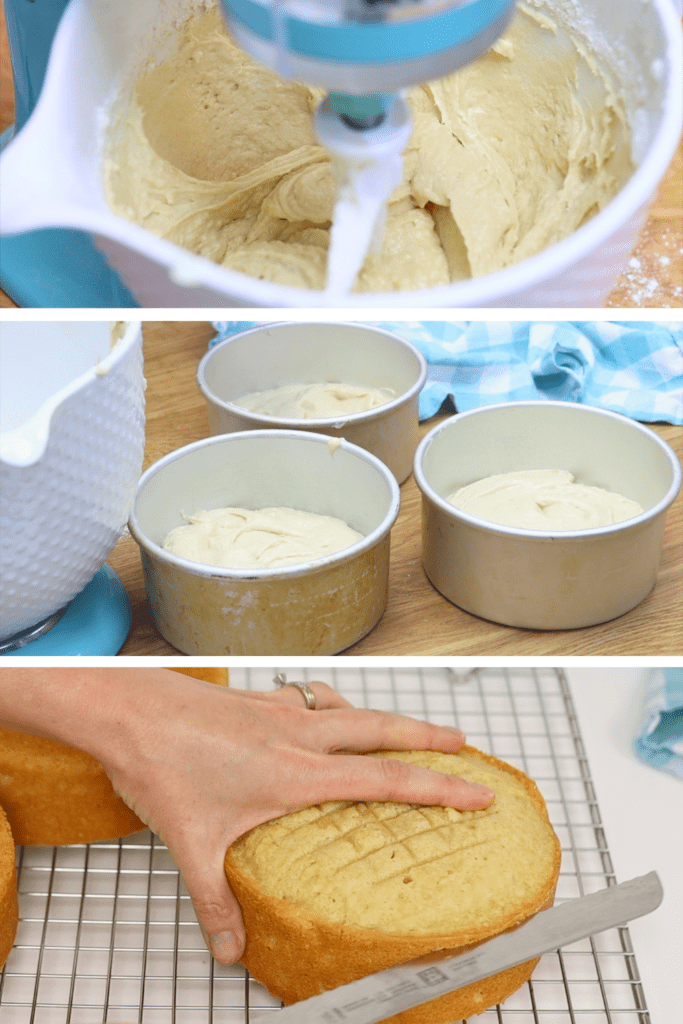
It's easiest to mix the batter using a stand or handheld mixer. Start by creaming butter and sugar together at medium speed until it's fluffy and lighter in colour. The butter should be at room temperature so that it mixes well with the sugar.
Switch to a lower speed and add the eggs. This Coconut Milk Cake recipe is at the end of this tutorial with a video showing how to make it. Add vanilla and coconut milk and when that's mixed in add the dry ingredients: flour, baking powder and salt.
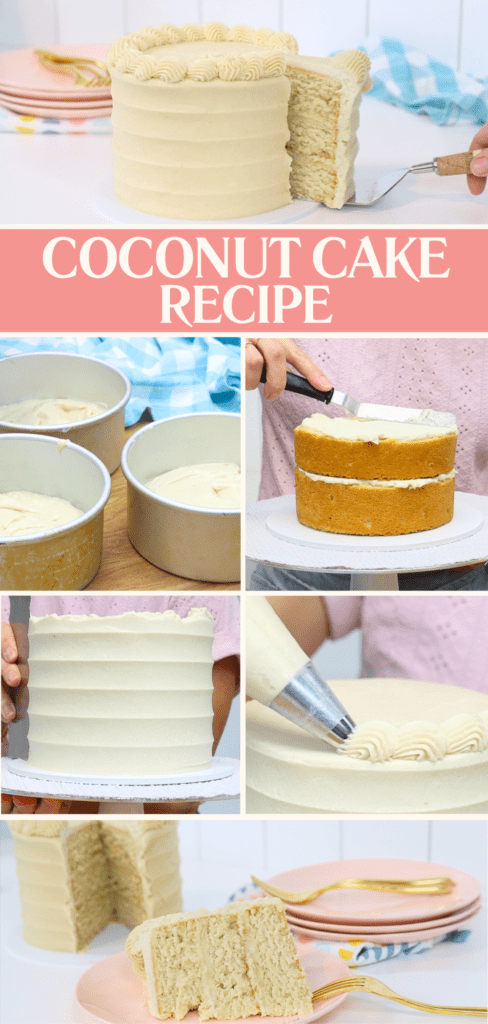
When everything is mixed together, divide the batter between three greased 6 inch pans. These cakes bake beautifully flat but for the neatest slices of cake you can level them. Do this after the cakes cool using a serrated knife like a bread knife. By trimming off the top of each layer you'll leave them level. The tops of the cake are the perfect treat while you put this cake together!
Make the coconut frosting and filling
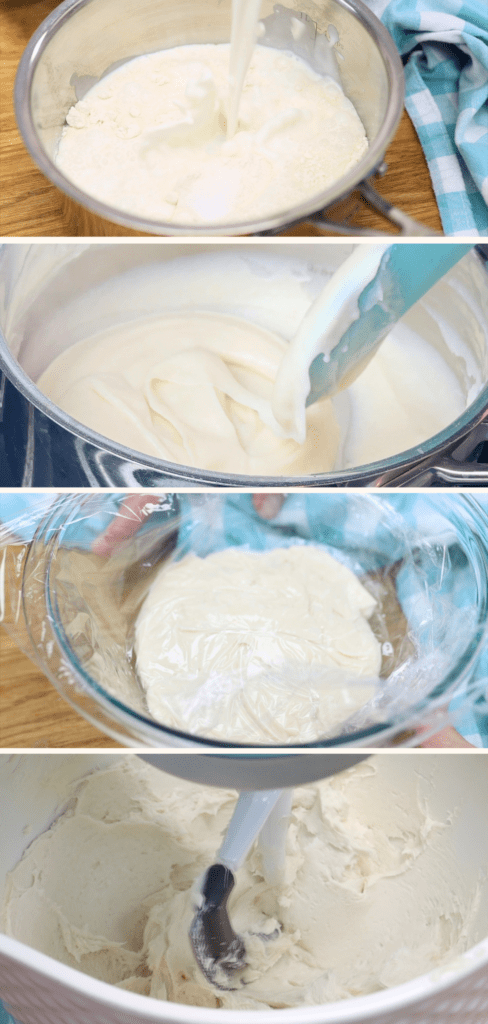
The coconut frosting for this cake is a cooked frosting, also called an ermine frosting. It's creamy and not too sweet and it compliments the cake wonderfully. To make it, whisk together flour, salt and both regular milk and coconut milk in a pan. Bring it to a simmer over low heat, whisking constantly until it thickens which will take 5 to 10 minutes. As soon as it thickens, switch to a spatula and scrape along the bottom and sides of the pan. This will prevent lumps. Stir for about 2 minutes until the mixture thickens enough to leave ribbons when you lift the spatula.
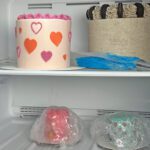
Take the pan off the heat and add vanilla before pouring it into a heat proof bowl. Press cling film or Saran Wrap down onto the surface to cover it. Then put this into the fridge for about 30 minutes to bring it to room temperature. You don't want to chill it, just cool it down.
To make the frosting, mix butter and sugar for about 3 minutes until it's soft and looks fluffy. Add the coconut mixture and mix for maybe two more minutes to make the filling and frosting for the cake. I can't wait for you to try this coconut frosting! In case you want to make more similar frosting recipes, try my eggnog cake or cookie dough cake!
Put the coconut milk cake together
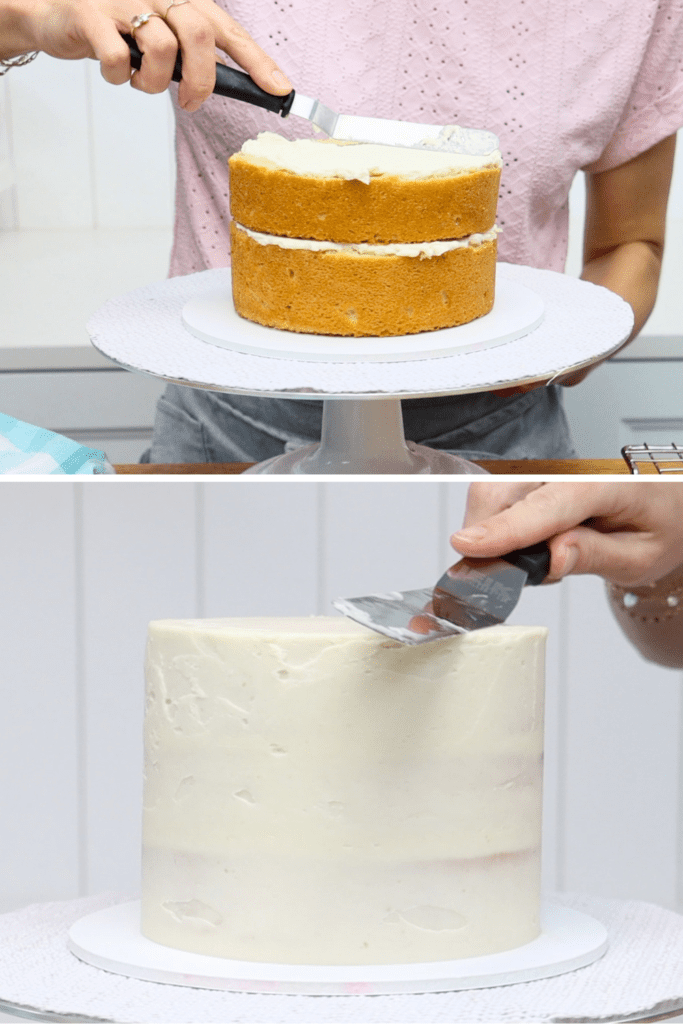
To assemble this cake, start by spreading a bit of frosting onto the middle of a cake board. Then press your first cake layer down onto it to attach it. Spoon on about a quarter of a cup of the coconut frosting and spread it over the top of the cake layer. Then lower the next cake layer down, making sure it's positioned straight on top of the layer below. Repeat with another layer of filling and then the final cake layer. Put this into the fridge for 30 minutes or the freezer for 15 minutes to chill and set the filling before you frost it.
Frost the coconut milk cake
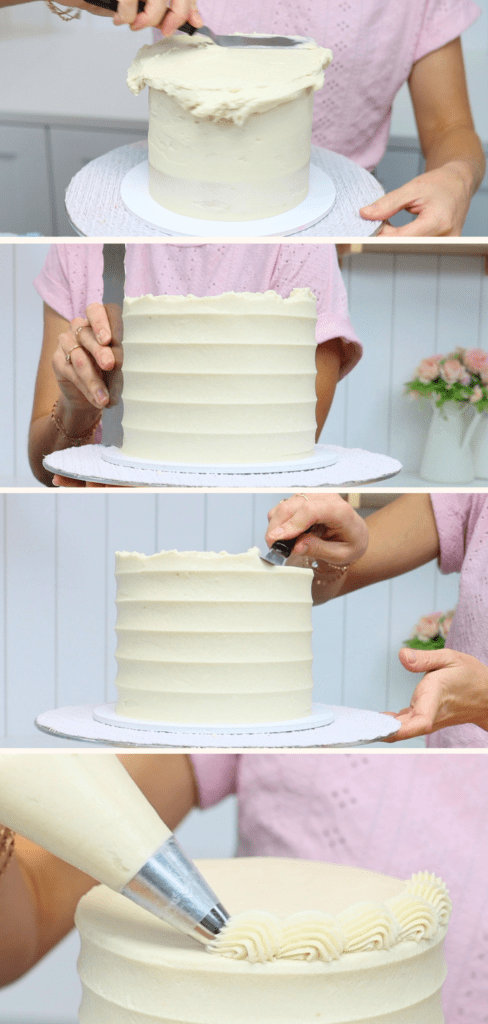
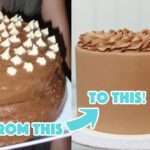
I always recommend doing a crumb coat of frosting before the final layer. A crumb coat is a thin layer of frosting to trap any crumbs that come off the cake. It prevents crumbs from getting into the final layer, making the cake look much neater. After smoothing the crumb coat, chill the cake again for 15 to 30 minutes in the fridge or freezer. The cold will set the crumb coat so that the next layer of frosting doesn't blend with it.
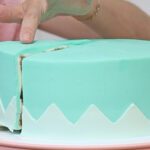
Then add another layer of frosting. I'm adding texture so I'm spreading it on quite thickly. You use a textured cake comb in exactly the same way as a straight edged cake comb so there's not need to learn a new technique! Rest the base of the comb down on the cake board to line it up straight against the side of the cake. Spin the turntable with your other hand. Push the cake comb very very gently against the frosting as the cake spins around to smooth it. Then swipe the comb away when you can't spin the turntable any further.
Spread some frosting over any gaps or indents in the frosting and then use the cake comb again. Do this as many times as you need until the frosting is smooth. Swipe sideways over the top of the cake to flatten the frosting that's sticking up, wiping your offset spatula or palette knife clean after each swipe. For more frosting ideas, take my free course on 10 Frosting Techniques!
Add finishing touches
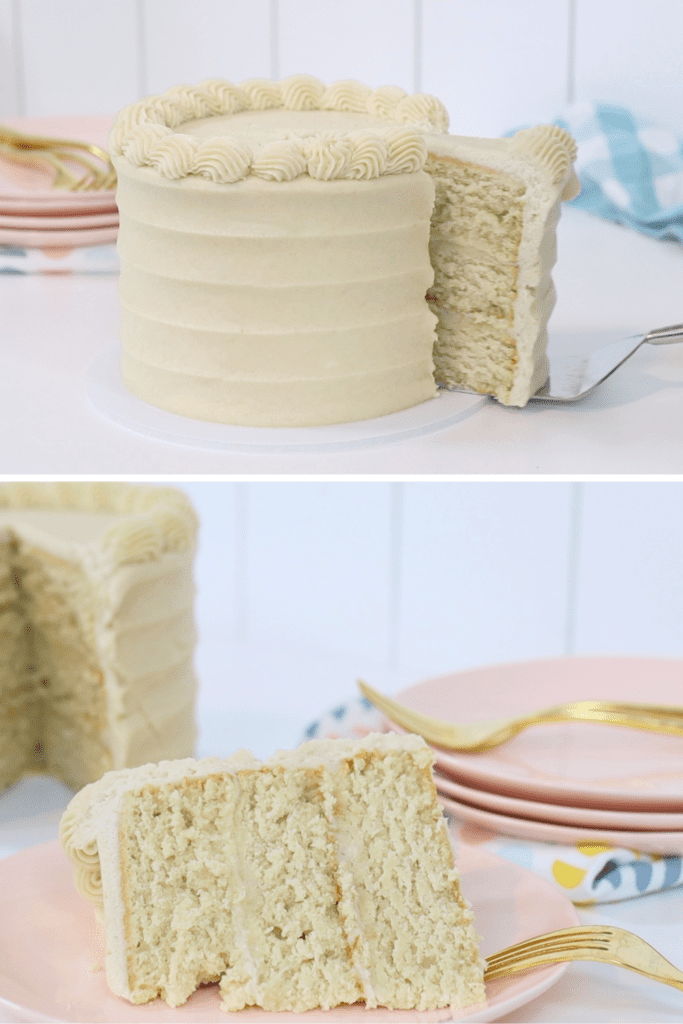
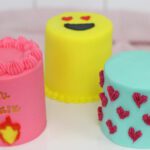
To add a quick finishing touch, put the rest of the frosting into a piping bag with any star shaped tip. I'm using ga 4B. Pipe a border around the top of the cake, squeezing the piping bag to push out a textured bead shape. Then release your pressure as you pull the bag away. You'll leave a tail on the bead which you'll cover up with the next bead.
How to store and serve this coconut milk cake
This cake can be kept in the fridge for 3 days but should be served at room temperature. The cake and frosting taste best when they're soft so take it out of the fridge about 2 hours before you slice it. I hope you love this cake as much as I do!
You can also watch a video of how to make this Coconut Milk Cake:
This coconut milk cake recipe uses coconut milk in the cake layers, filling and frosting for the most deliciously rich coconut flavour!
Ingredients
UnitsScale
For the cake layers:
1cup unsalted butter
2cups white sugar
4 eggs
1 1/3cups coconut milk*
1 teaspoon vanilla
3cups plain flour (all-purpose)
1 1/2 teaspoons baking powder
1/4 teaspoon salt
For the coconut filling and frosting:
1/3cup flour (all-purpose or plain)
2/3cup milk
1/3cup coconut milk*
1/2 teaspoon salt
1cup unsalted butter
1cup white sugar
1 teaspoon vanilla
Instructions
To make the cake layers:
Using an electric mixer (a stand mixer or handheld), beat the butter and sugar at medium speed until light and creamy, about 3 minutes.
Add eggs two at a time, mixing on low speed to incorporate after each addition.
Add coconut milk and vanilla and mix at medium speed.
Add flour and baking powder and mix on the lowest speed until just combined.
Divide batter between three greased 6" cake pans and bake at 325F or 160C for 35 minutes or until cakes spring back up when poked in the middle.
Leave cakes in their pans for 10 minutes before turning out onto a cooling rack and let them cool completely.
To make the coconut filling and frosting:
Put flour, milk and salt in a pan and cook over medium heat for about 5 minutes. Whisk it constantly until it simmers to prevent lumps. Once it simmers, switch to a spatula and continue to stir, scraping around the sides and bottom of the pan. Stir for about 2 minutes until the mixture thickens enough to leave ribbons when you lift the spatula.
Remove the pan from the heat and pour into a heatproof bowl. Stir in vanilla and cover the bowl with plastic wrap (e.g. cling film / Saran Wrap), pressing it down to touch the surface of the mixture. Put it into the fridge for about an hour to cool to room temperature.
Mix butter and sugar at medium speed until creamy and lighter in colour, about 3 minutes. Add cooled flour mixture and mix for another minute, until smooth.
To put the cake together:
Spread a bit of coconut frosting onto the middle of a cake board or plate and press your first cake layer down to attach it. Spread coconut frosting to cover the top of the cake and then place then final cake layer on top.
Put the cake in the fridge for 30 minutes or the freezer for 15 minutes to chill and set. Then spoon about half of the remaining coconut frosting on top and spread with an offset spatula or palette knife to cover the cake. Use a straight edged cake comb or frosting smoother to smooth the frosting but it doesn't need to be perfect yet! Chill in the fridge for another 30 minutes or freezer for 15 minutes to set this crumb coat of frosting.
Spoon the rest of the coconut frosting onto the cake and spread to cover the cake. Smooth or add texture with a textured cake comb. Optionally, spoon the leftover frosting into a piping bag fitted with any star tip (I used a 4B) and pipe a border around the top of the cake.
You can refrigerate this cake for 3 days but take it out 2 hours before serving so that the cake and frosting come to room temperature.
Notes
* To make this recipe using exactly one (13.5oz or 400ml) can of coconut milk, measure the coconut milk for the cake layers and pour the rest of the coconut milk from the can into a measuring jug (if you're measuring in ml) or measuring cup (if you're measuring in cups). This will be used for the frosting. Use regular milk to fill up the measuring cup to the top or to fill the measuring jug to 235 ml. This way you won't need to open another can of coconut milk if you're a little bit short!
I'm so glad you're signing up for my newsletter! You're sure to find loads of caking inspiration and learn from the tips and tricks I've discovered throughout my career!
Want to learn more?
Get immediate access to my FREE course on 10 Frosting Techniques and my newsletter with loads of caking inspiration, tips and tricks!