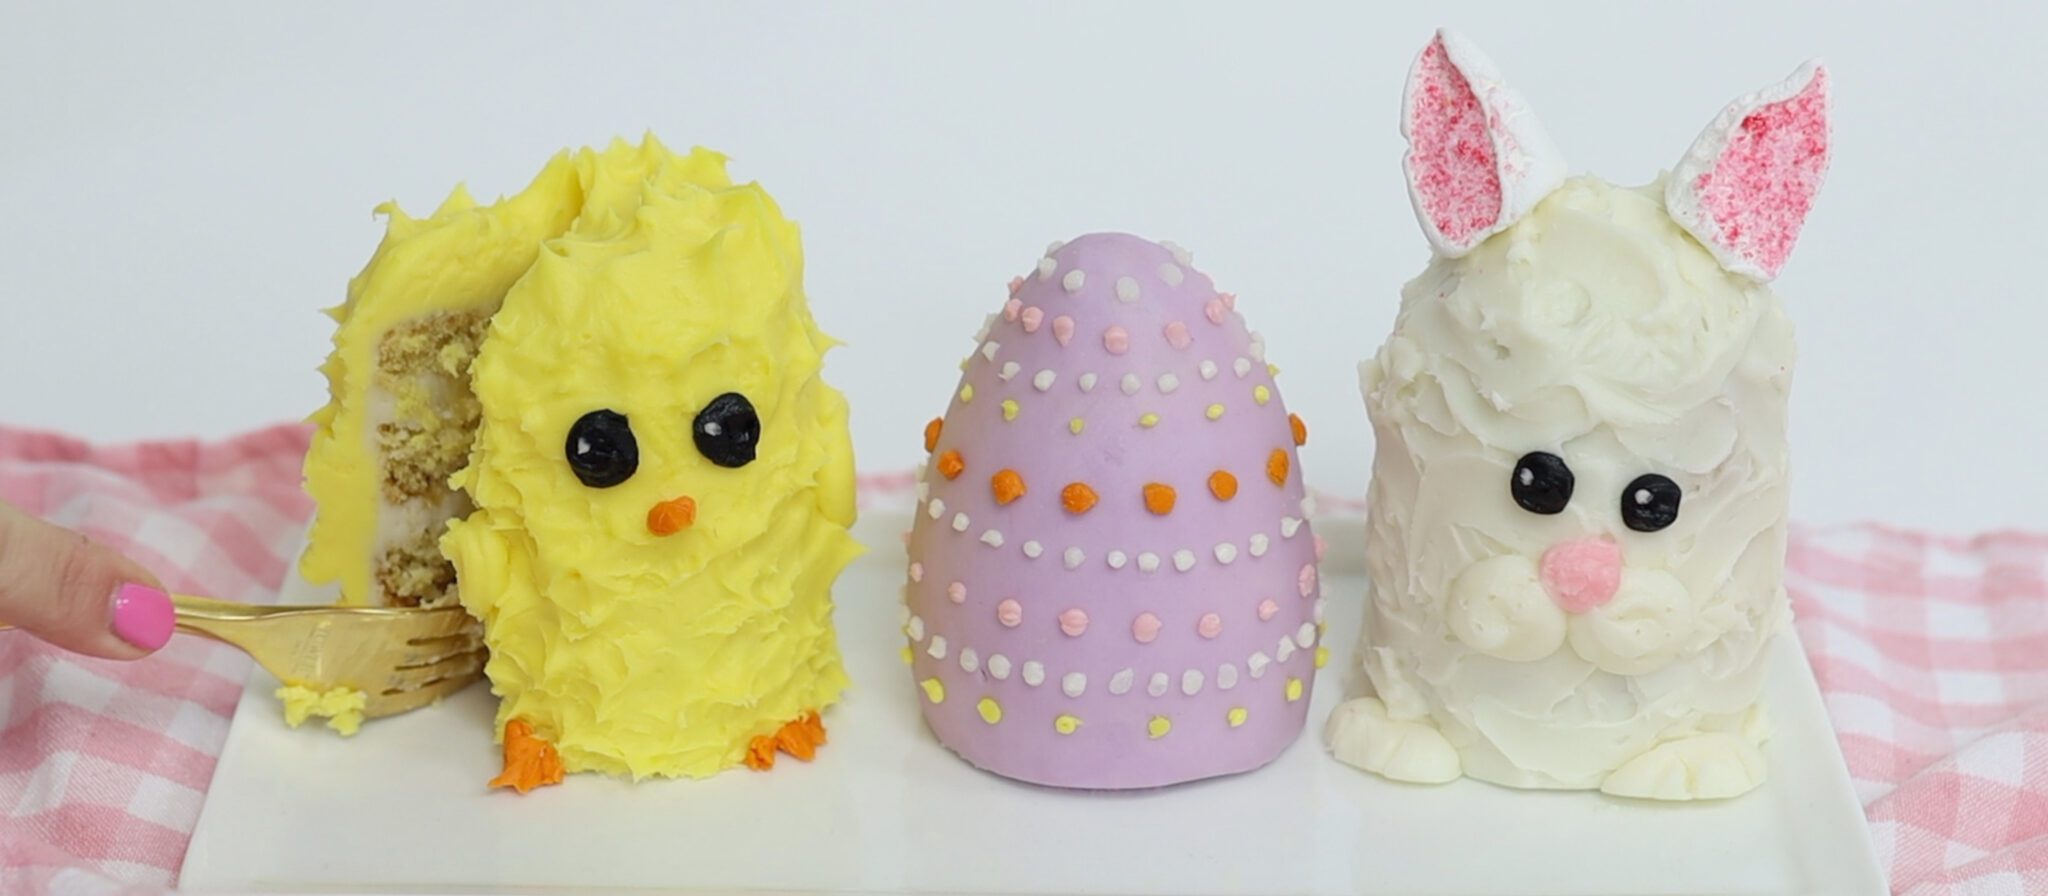
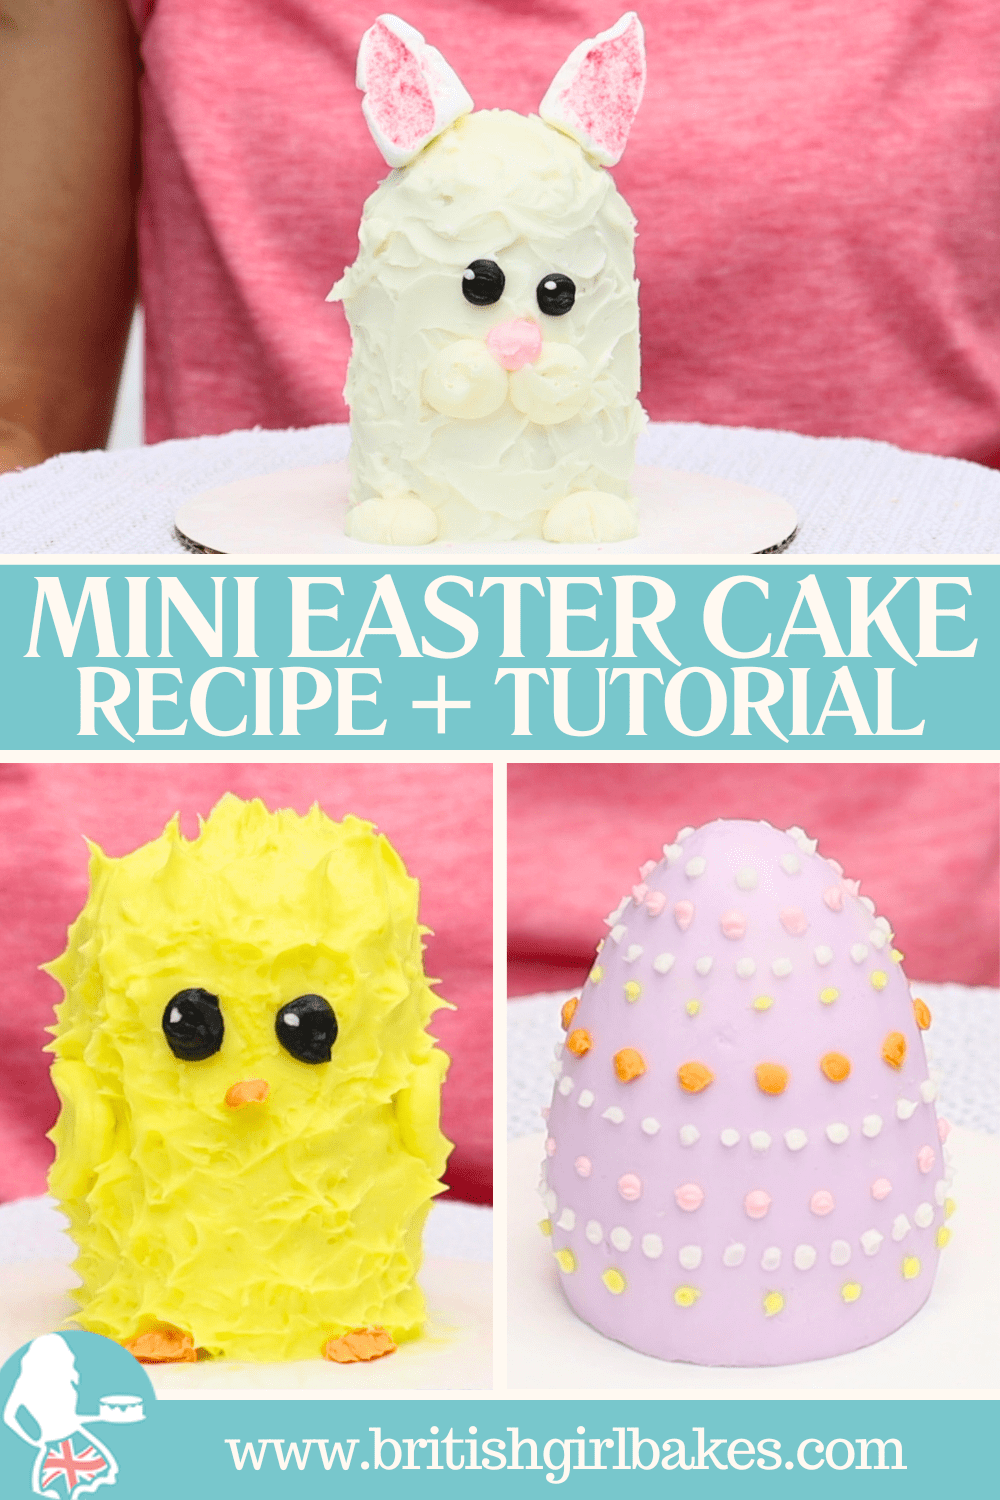
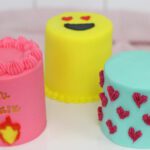
Let's make these cute and fun mini Easter cakes using cupcakes! I'l show you how to bake, assemble, frost and decorate this bunny, chick and Easter egg mini cake.
Prepare the cake, filling and frosting
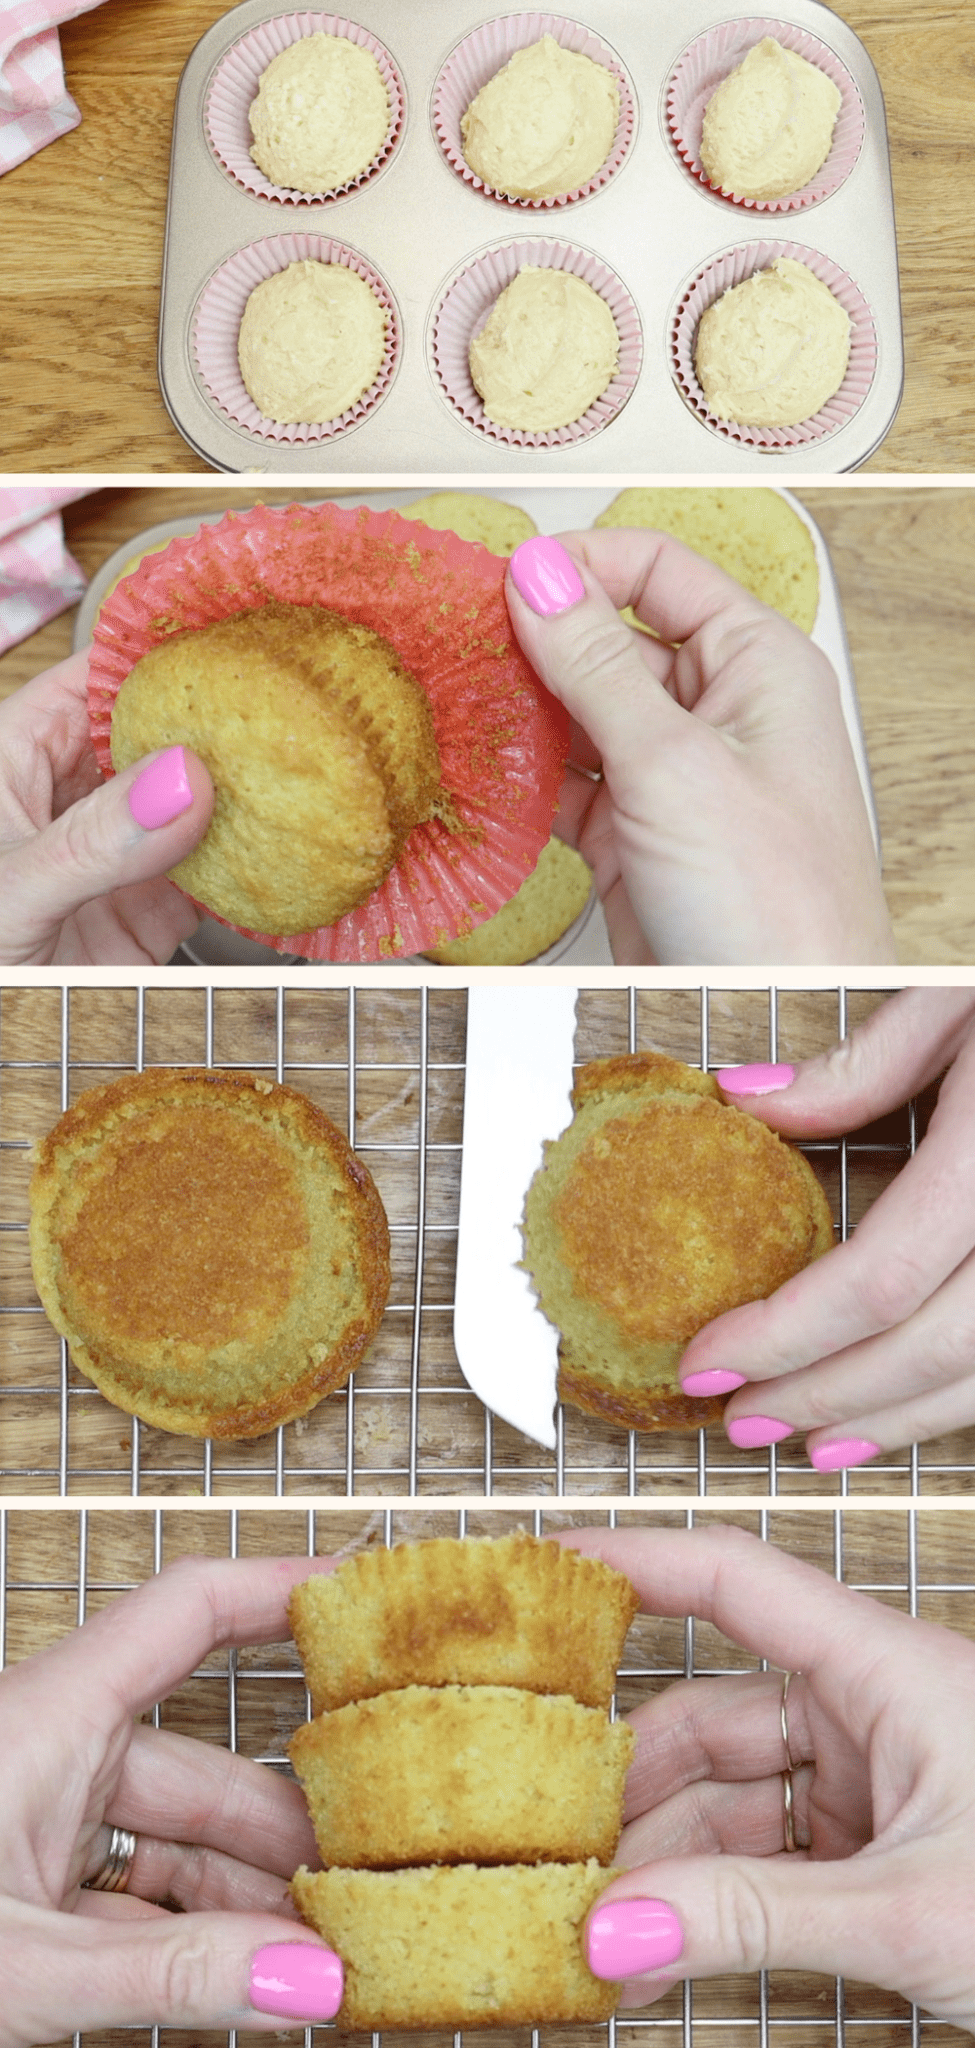
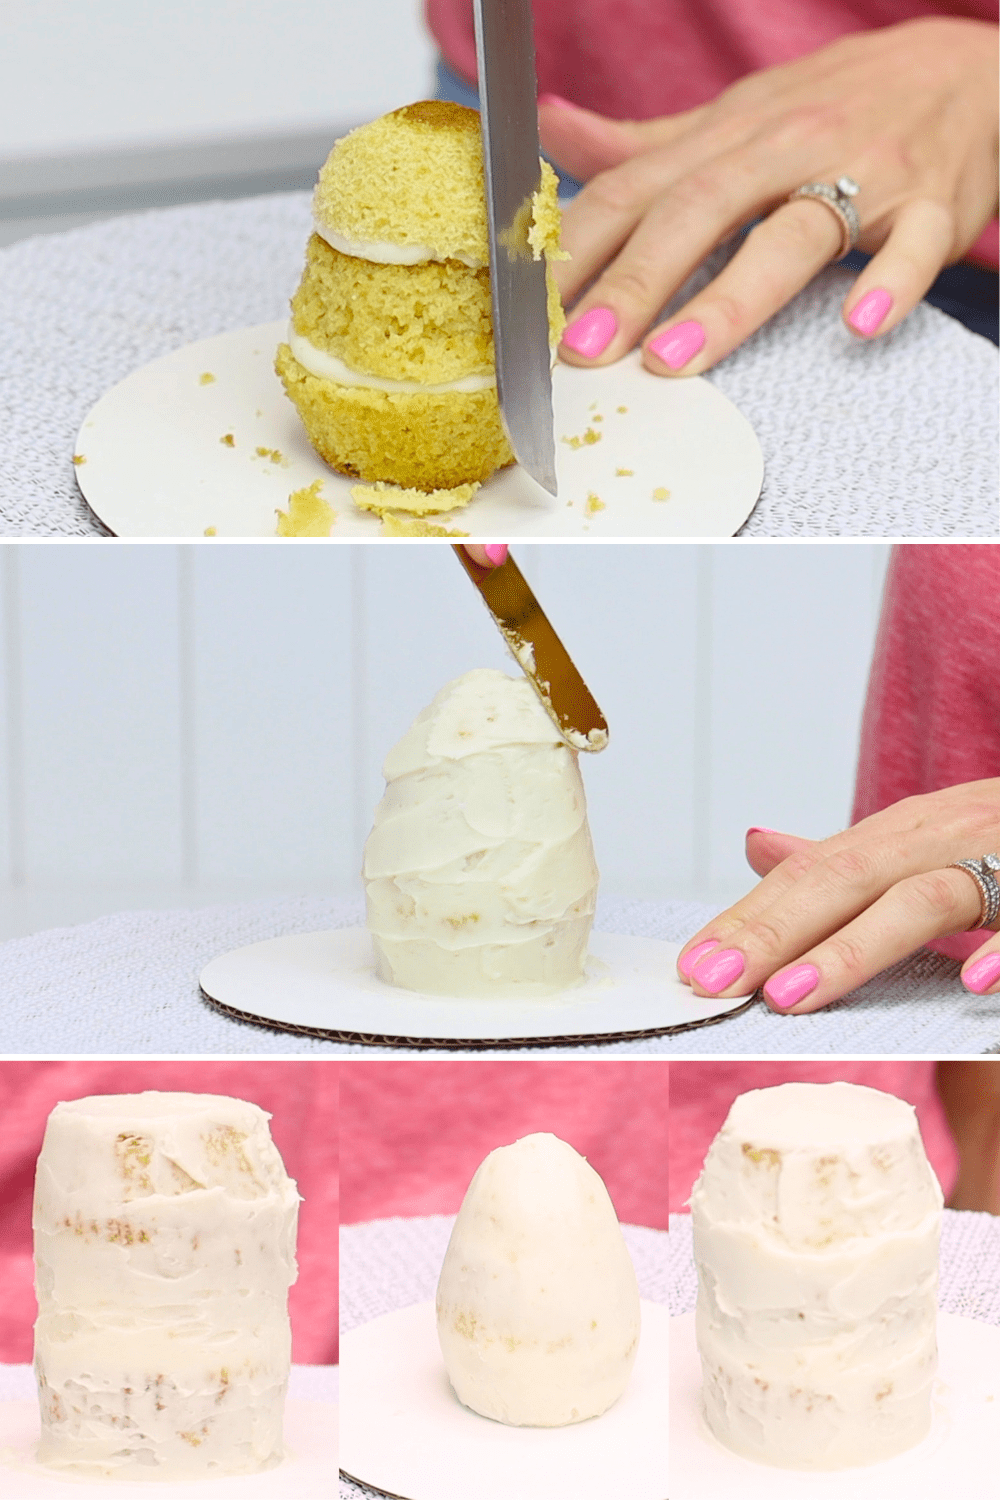
You'll need three cupcakes to make each mini cake. After baking let the cupcakes cool and take them out of their wrappers. Don't worry if they're domed or overflowing because you can cut that part off. Use a serrated knife like a bread knife to trim off the tops to level the cupcakes so they're flat. Three trimmed cupcakes makes a nice tall mini cake. I like the height of these Easter mini cakes, especially for the Easter egg, but you can use just 2 cupcakes for each if you prefer.
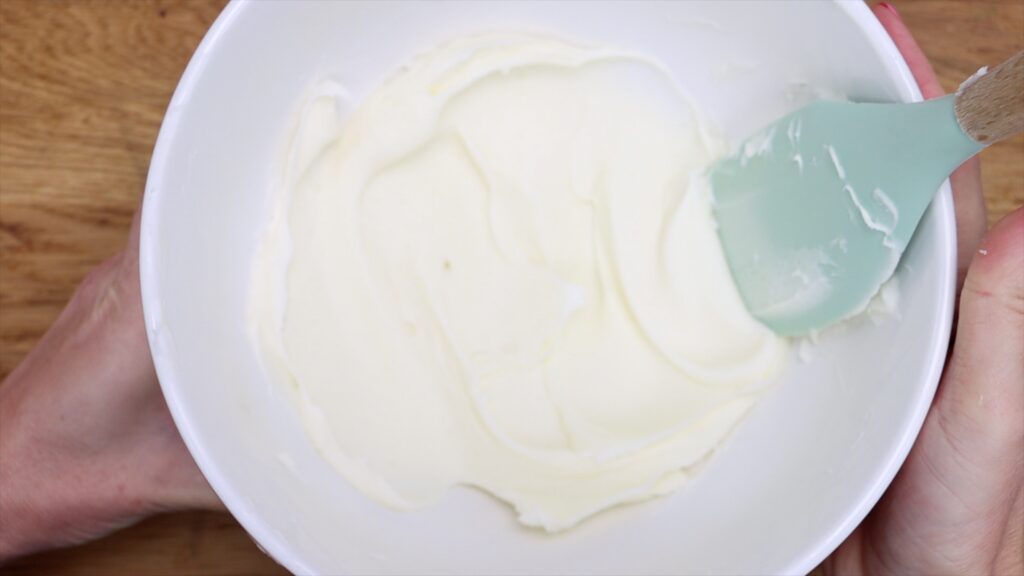
Next, make your buttercream. The recipe for this mini batch of my 4 Minute Buttercream is at the end of this tutorial.
For easy fillings for these mini cakes choose anything you can spoon onto the cake. For example, Nutella, dulce de leche or caramel, jam, and lemon curd all work well.
Put the mini cakes together
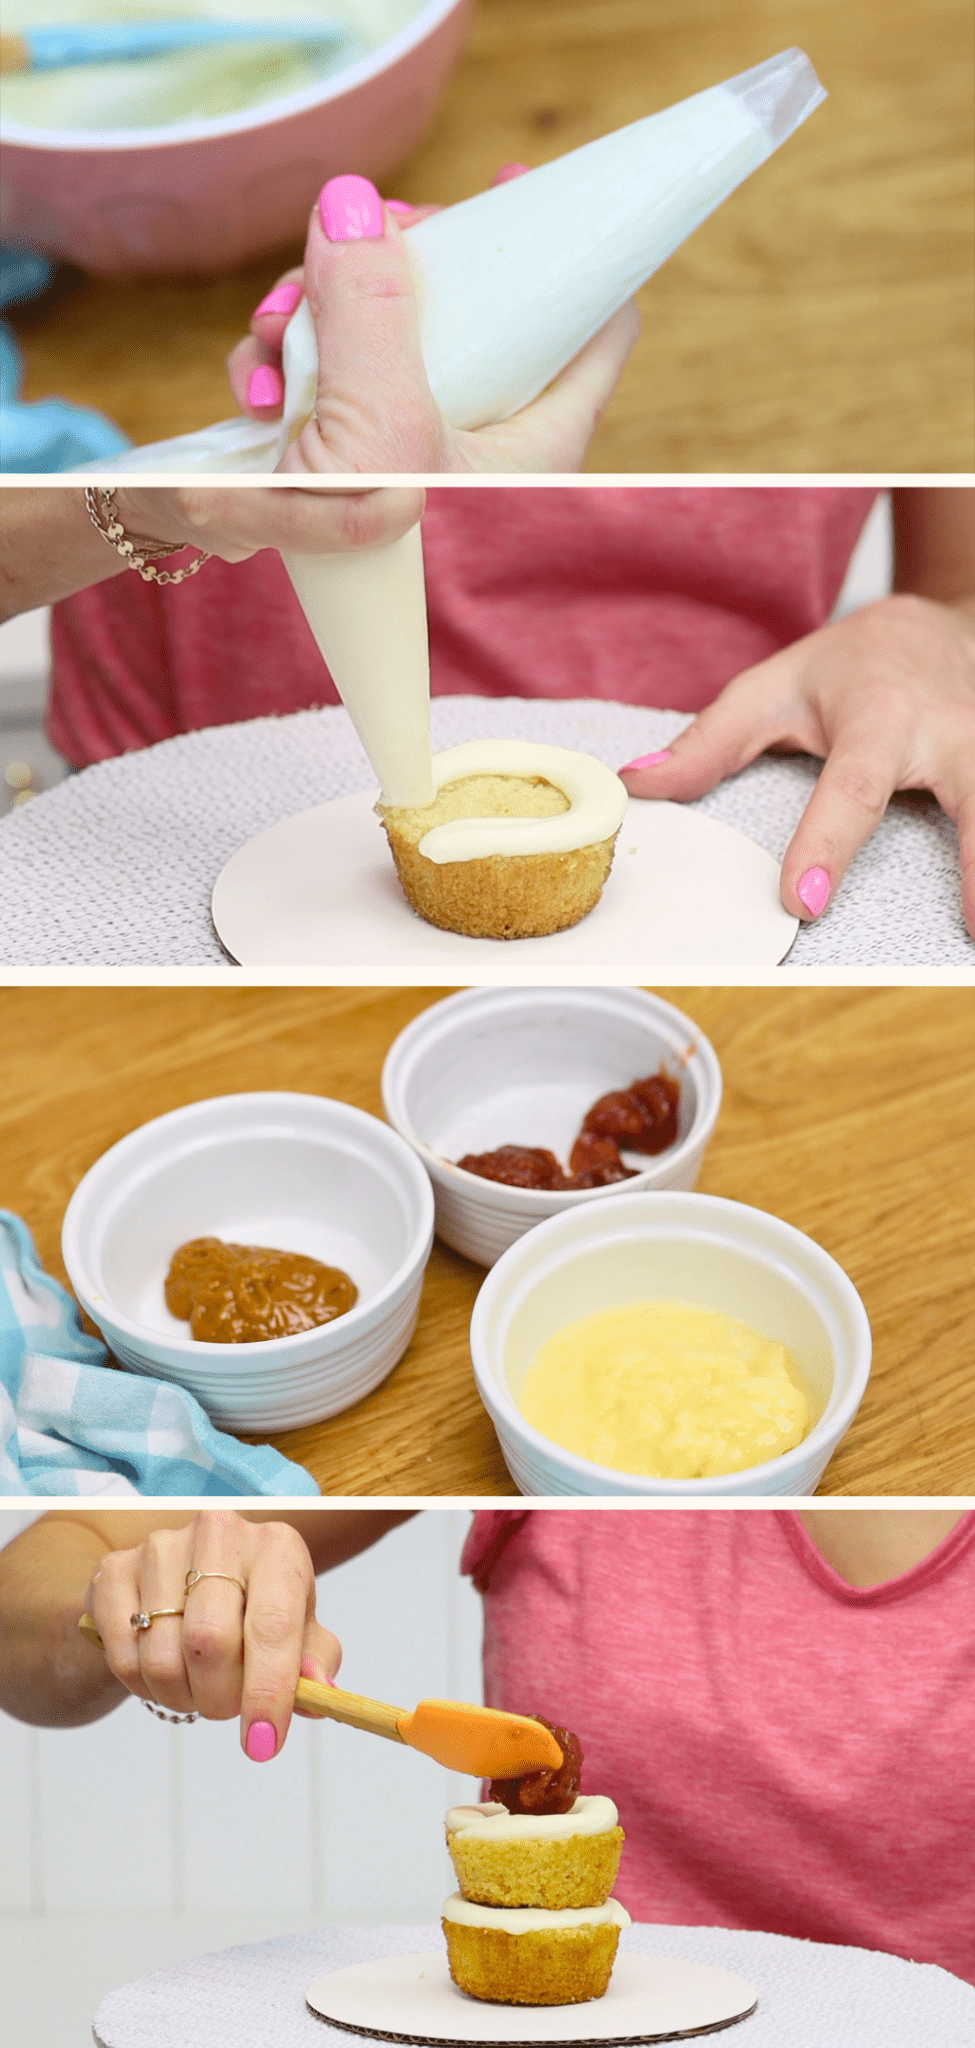
It's easiest to put these mini cakes together with the buttercream in a piping bag. You'll need a cake board at least 4 inches wide. My cake boards are 6 inches wide.
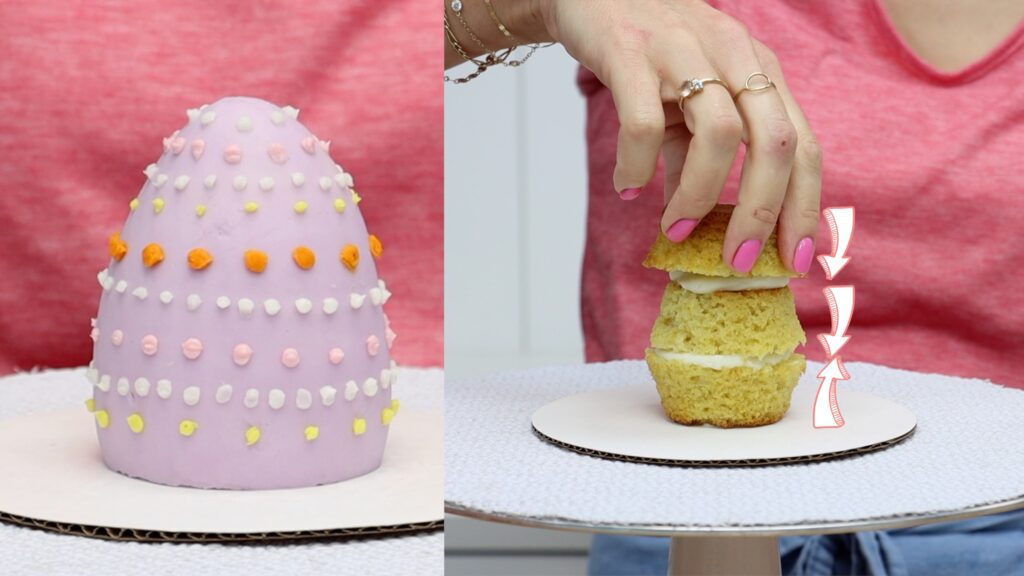
Start with a blob of buttercream on the middle of the cake board. Push the first cupcake down onto it to attach it, which makes frosting it easier. Then you'll need a buttercream dam to stop the filling oozing out from between the cake layers. This is a ring of buttercream around the edge of the cupcake, which you pipe. It acts like a wall to hold the filling in. Then put the next cupcake on top and the filling will stay where it's supposed to.
Check that the cupcakes are lined up directly on top of each other so the cake will be straight. Then repeat with another layer of filling and the final cupcake.
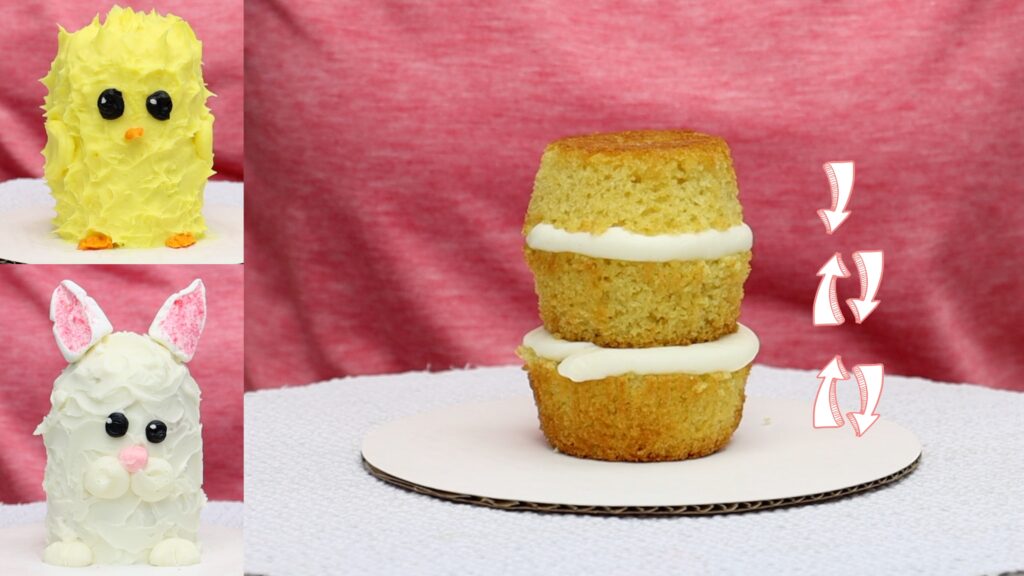
For an Easter egg mini cake put the bottom cupcake upright and the next two upside down.
For a chick and a bunny it doesn't matter for the bottom layers but put the top cupcake upside down:
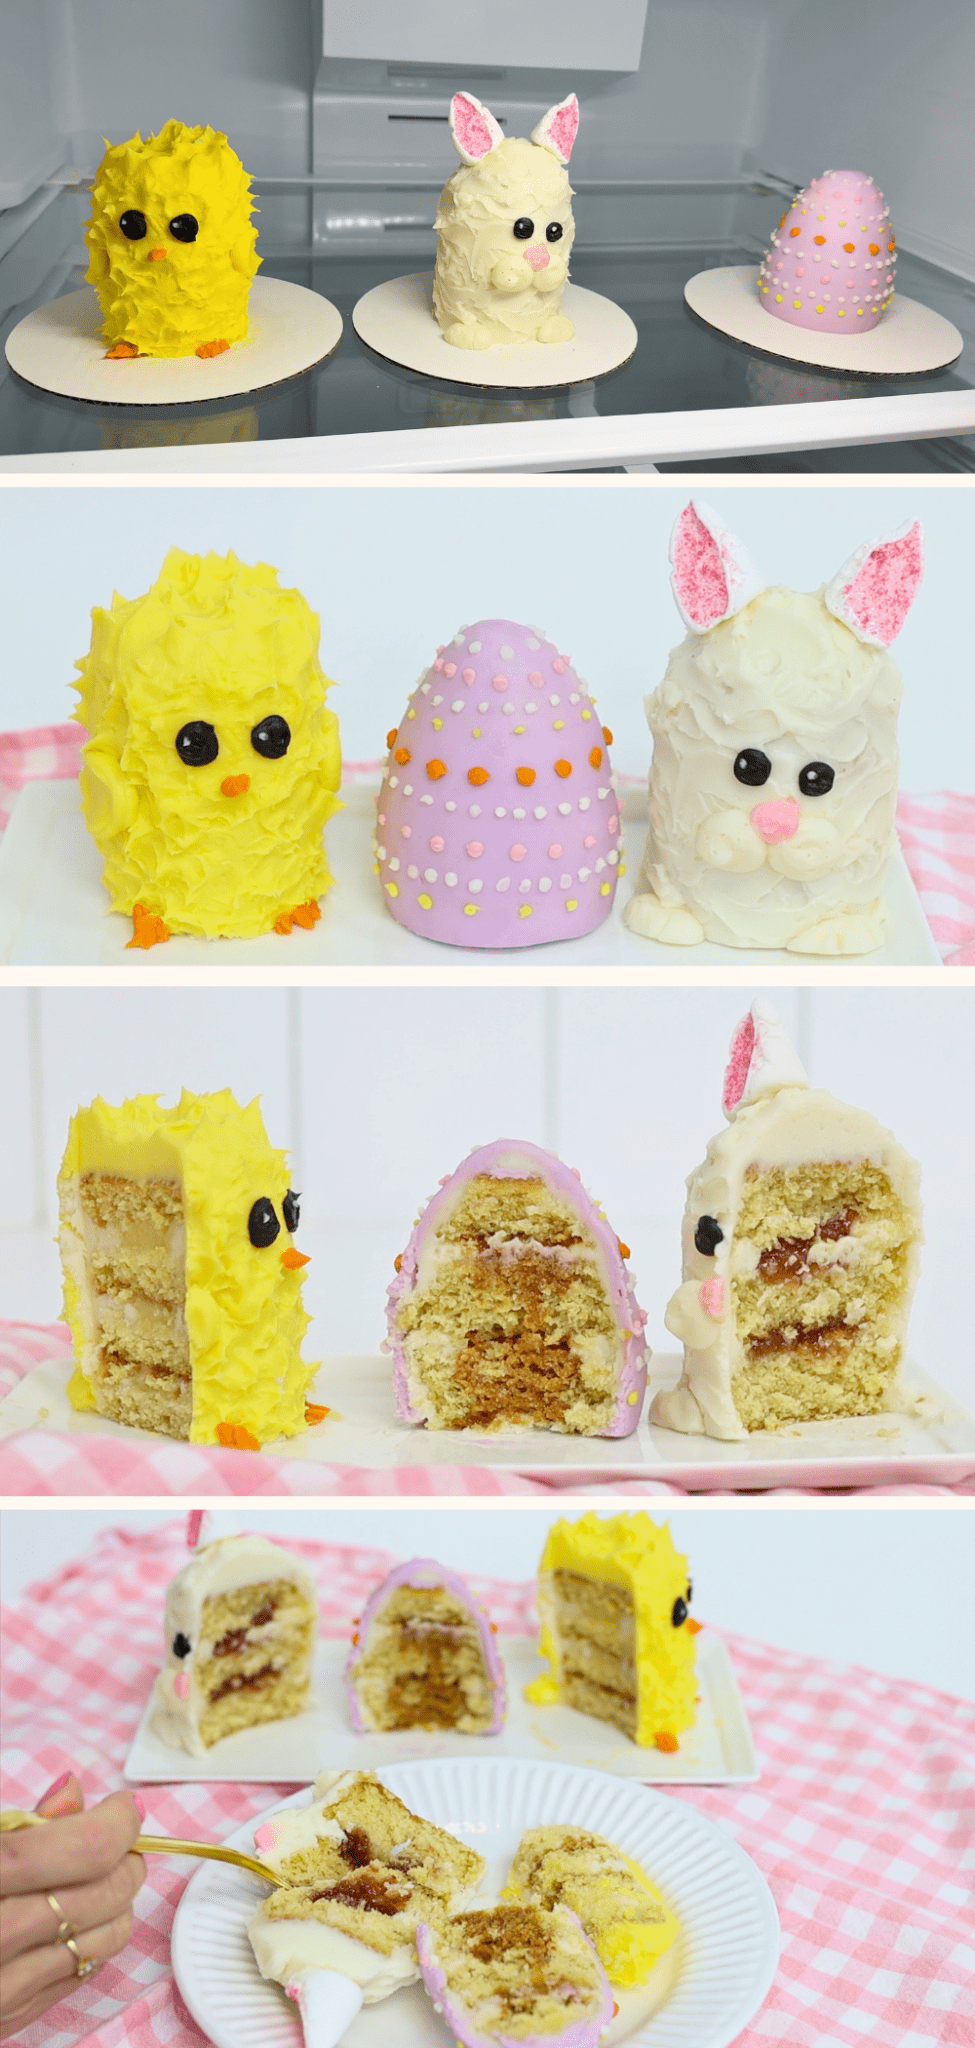
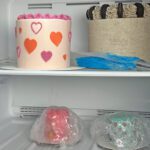
Put the assembled mini cake into the fridge for 30 minutes or the freezer for 15 minutes before you frost it. When the cake and buttercream get cold they'll get firm and less crumbly. Now it will be much easier to spread the frosting onto the mini cake.
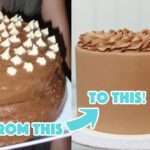
The first layer of frosting is called a crumb coat. It's a thin layer of buttercream to trap any crumbs that come off the cake. You can smooth this with the side of your offset spatula or palette knife or use a cake comb. Don't worry about getting it really neat because it's going to be covered up soon.
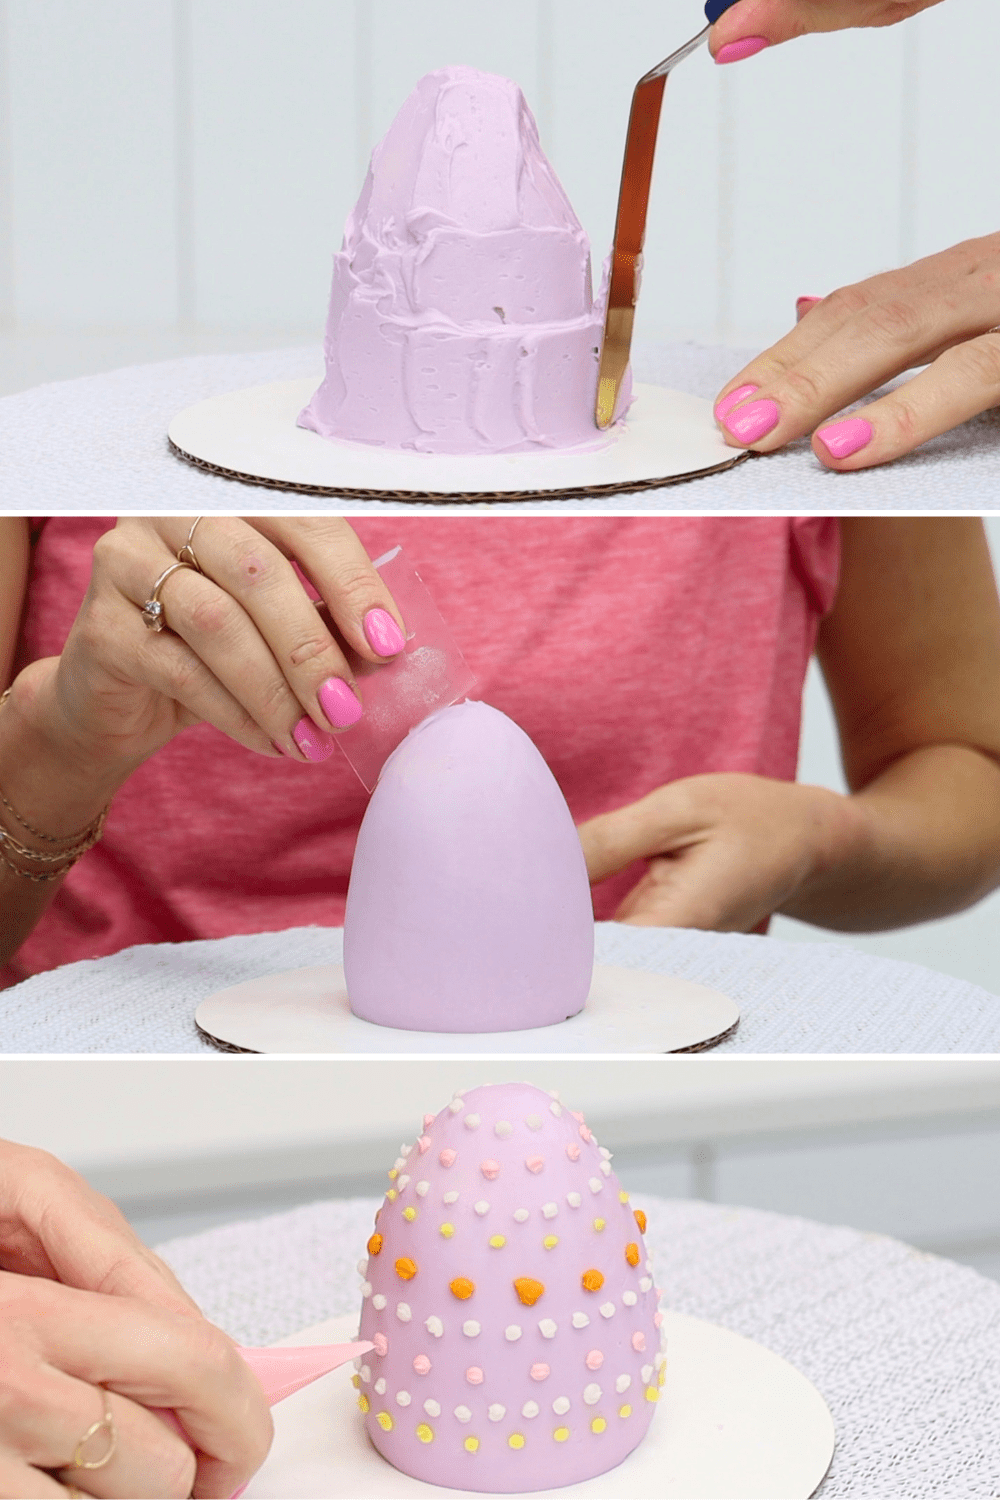
For an Easter egg mini cake, before frosting it you need to carve it into an Easter egg shape,. This is much easier than it sounds. When it's cold from the fridge or freezer, use a serrated knife like to cut diagonally down around the top. Start by taking just a little bit off the top cupcake. Then gradually carve off more and more until you have a cone shape with a rounded top.
Putting the bottom cupcake upright and the next one upside down makes the rounded bottom shape of the egg. After carving the cake, if it's still cold you can crumb coat it straight away. Although the crumb coat doesn't need be smooth, practicing will make you confident for the final coat. A piece of acetate is the best way to smooth curved surfaces because it wraps around the cake without leaving trails along the sides.
Put the crumb coated cakes into the fridge for 30 minutes or the freezer for 15 minutes before decorating.
Decorate the mini Easter cakes
Easter chick mini cake
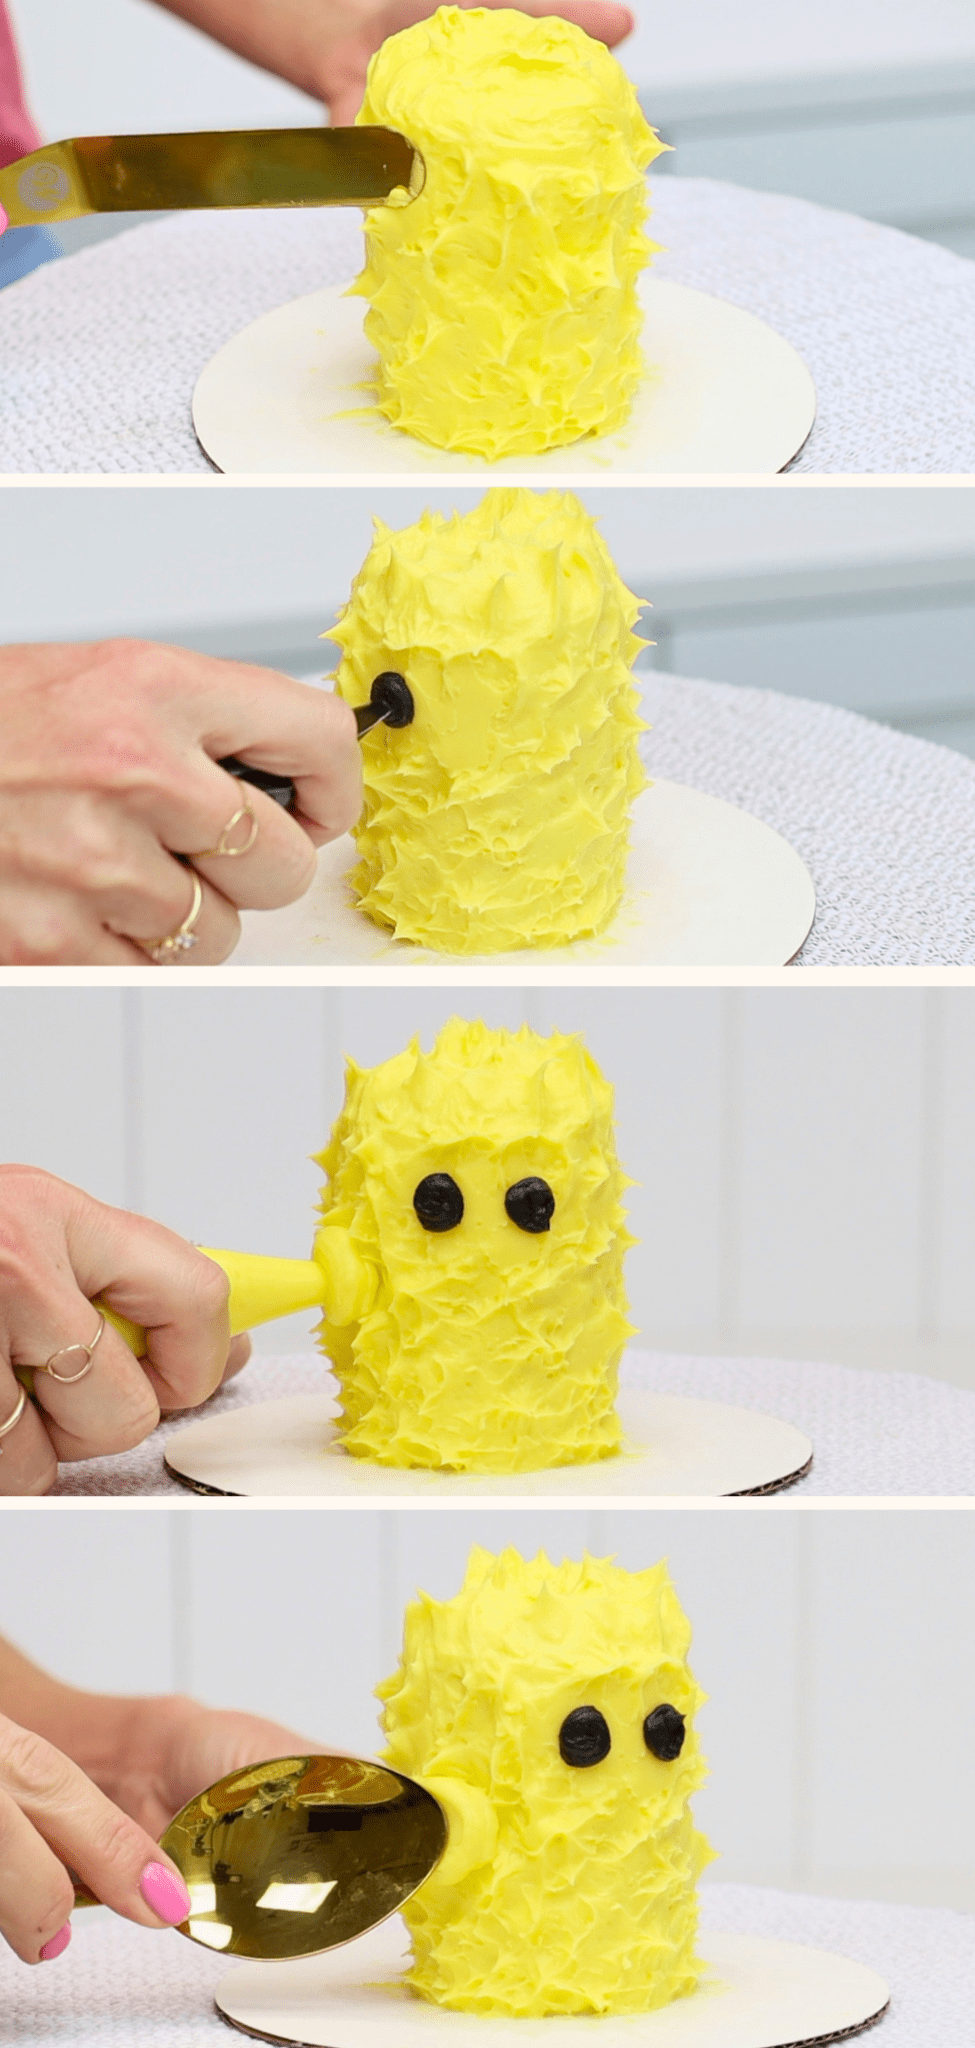
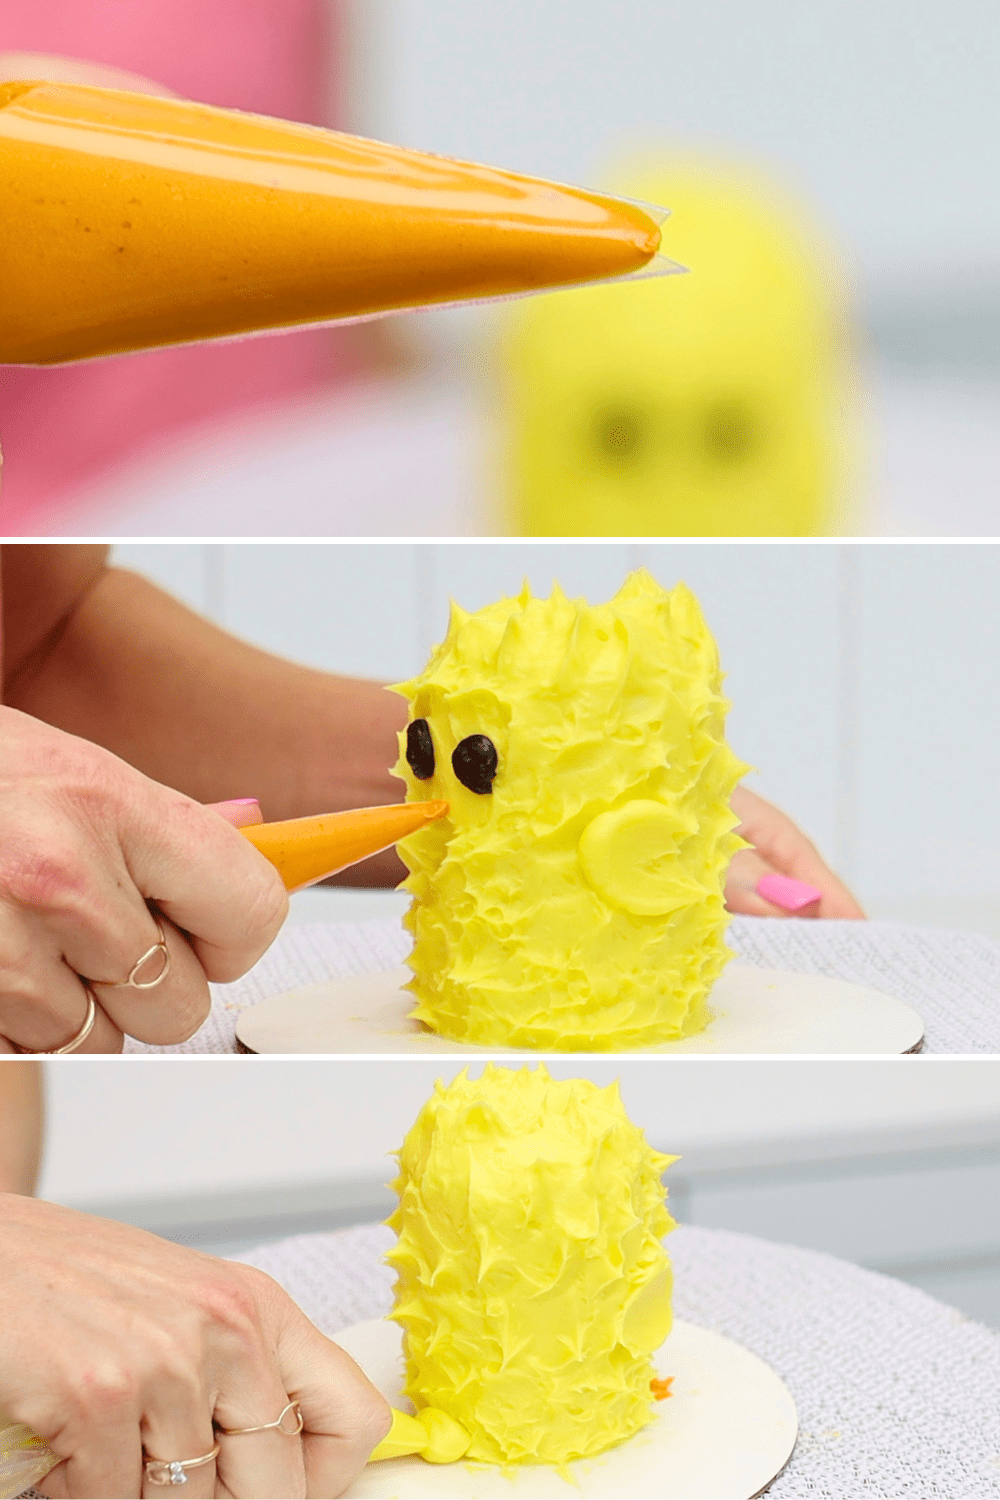
For the chick, spread yellow buttercream to cover the whole cake. This design is great because you don't need to smooth the frosting. When the whole cake is covered up, use the tip of your spatula or palette knife to gently press against the frosting and then pull away. You'll leave little yellow peaks like fluffy chick feathers.
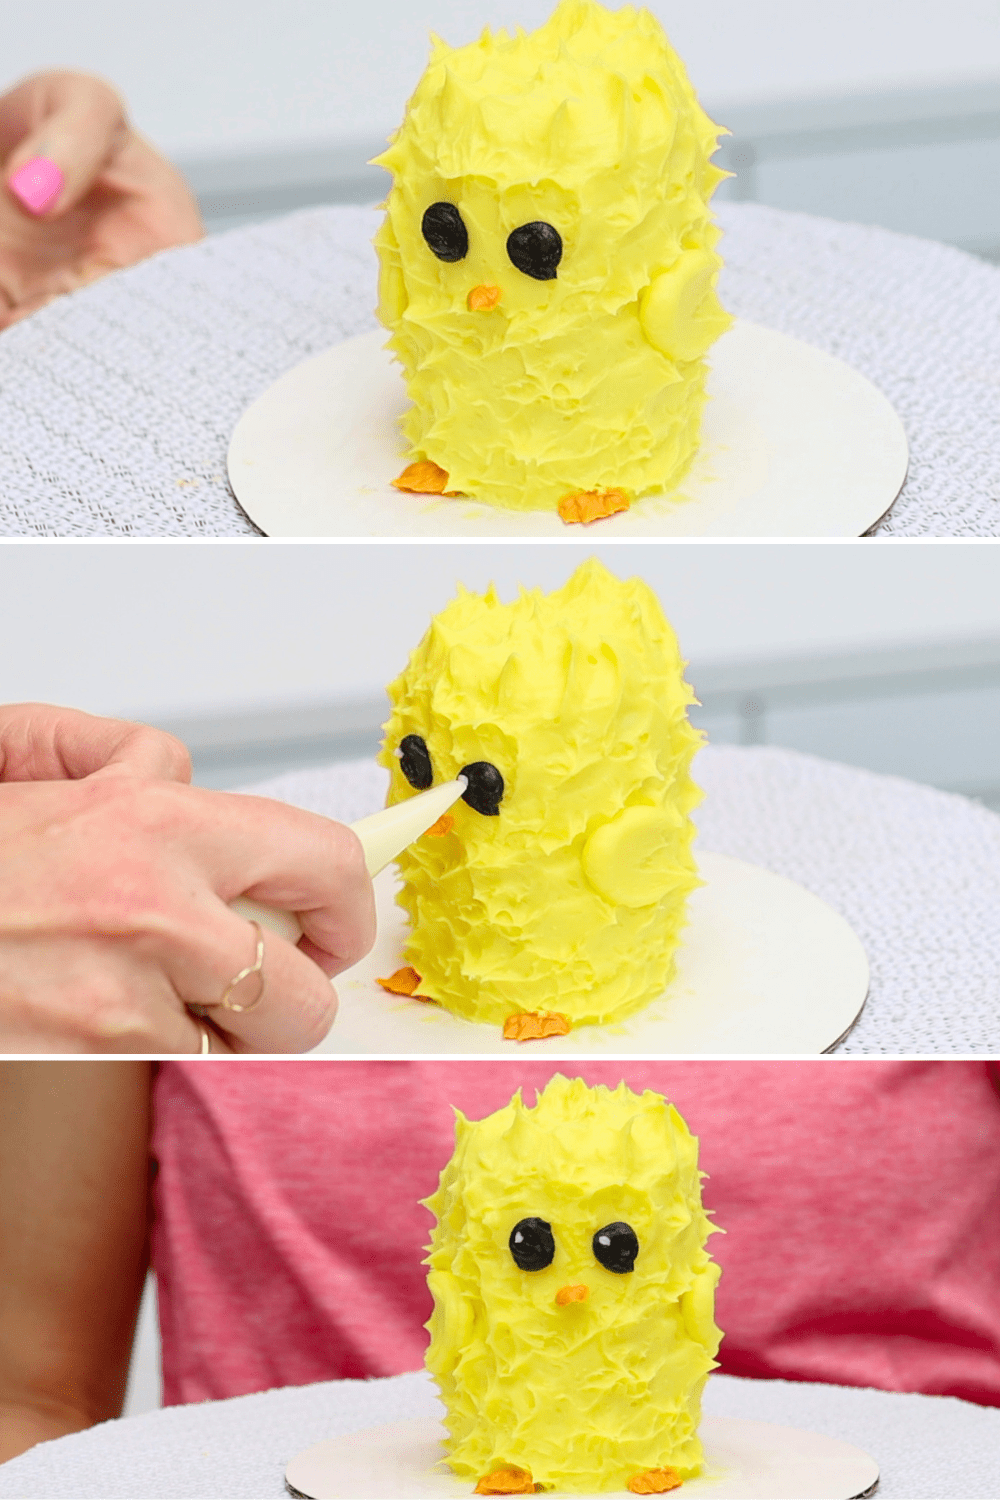
Smooth out a little patch where the eyes will go. Then use black buttercream in a piping bag with a tiny piece cut off the end to squeeze out a dot for each eye. Let the buttercream bulge out until the eye is as big as you'd like it to be. We'll make these eyes look less ghostly in a minute!
Put the leftover yellow buttercream in a piping bag with a larger piece cut off the end. Squeeze a dot on each side of the chick to make a wing, swiping it sideways with the back of a spoon.
For the beak and feet cut a V into the end of a piping bag. Spoon in a spoonful of orange buttercream and hold the piping bag like Pac-Man with an open mouth. Squeeze the buttercream out and stop squeezing as you pull away to make a pointed beak. Do the same thing for the feet with three little spikes on each side of the chick.
With the yellow buttercream I'm piping a tail and adding some texture to make that look fluffy.
To finish off the eyes, add a tiny white dot in each one. You'll need plain white buttercream for this and a piping bag with a really small piece cut off the end. Try to get the dot in the same place for each eye. This Easter chick mini cake is such a cutie!
Easter egg mini Easter cake
Now the Easter egg cake. You can use any colour for the frosting but pastel colours are traditional for Easter eggs. Spread the frosting to cover the cake from top to bottom, creating the rough shape of an egg. Then use a little piece of acetate to scrape upwards to smooth the frosting. If you notice faint lines of texture going vertically up the cake, hold the acetate sideways and scrape around the cake instead.
To decorate the egg I'm piping dots by cutting the end off piping bags with different colours. They're the same colours I used for the other mini cakes to use up the leftover buttercream. The dots are simple to pipe but the trickiest part is keeping the line of dots straight. You could measure the height and use a toothpick to poke a few dots around the cake as a guide as you pipe. Or just do what I did and try to hold your piping bag in the same position as you spin the cake on the turntable with the other hand. With minimal movement of your piping hand, the dots are more likely to stay at the same height. If they aren't, scrape them off with acetate and pipe them again!
By cutting different amounts off the end of the piping bags you can make your dots bigger or smaller. You can also leave different amounts of space between the dots in each row. These two techniques add some variety to the design.
Easter Bunny mini cake
For the Easter Bunny, start the same way you made the chick. Cover the cake with frosting by spreading it on but don't smooth it. Then add texture using your offset spatula or palette knife or a spoon. Drag it in little arc motions around the cake to add texture to look like fur.
Put the leftover white buttercream into a piping bag with the end cut off to make a fairly large hole. Pipe two dots for the bunny's muzzle or cheeks and two dots for its feet. Add a final dot to make a tail and add texture to it like you did for the fur.
Pipe a nose with pink buttercream in a bag with less cut off the end. Use a toothpick to shape this into more of a triangle nose shape. Pipe two eyes just like the chick's, with black buttercream squeezed to expand to a big flat dot. Then put the cake in the fridge for 30 minutes to set these details while you make the ears.
Put a spoonful of sugar into a bowl and add a very small drop of pink colouring. Stir this around, smushing it with the sugar against the side of the bowl to mix it in. Then cut a marshmallow in half diagonally and press the cut side down into the sugar to make it pink. Do the same for the other half of the marshmallow. Poke a toothpick into the bottom, flat part of each ear.
Take the cake out of the fridge to add the ears and some final details. To finish off the eyes add a tiny white dot in the same place for each eye. Use a toothpick to score two lines on each foot to make toes. Also use the toothpick to poke some holes into the muzzle or cheeks.
Finally, poke the ears into the cake. This is easiest to do by pulling the marshmallow off the toothpick and poking just the toothpick in first . Then push the marshmallow onto the toothpick using the hole the toothpick made earlier. Isn't this bunny adorable?
How to store and serve these mini Easter cakes
These mini Easter cakes can be kept in the fridge for 2 to 3 days. If you want to transfer them from their cake boards onto a platter or cake stand, it's easiest to do that when they're cold. Cold frosting will be form so you won't damage it. Slide a cake comb or offset spatula underneath each cake to loosen then from their board. Then pick them up and place them on a platter or plate or cake stand.
Cakes taste best at room temperature so take them out of the fridge about 2 hours before you eat them. This gives the cake and buttercream a chance to warm up and soften. Yum!
You'll find the recipe for these Easter mini cakes below and you can toggle between US (cups) and Metric measurements.
This recipe makes cake and buttercream for 6 cupcakes to make 2 mini cakes. If you want to make all three designs, click the 2X to double the recipe and you'll have 12 cupcakes for 4 mini cakes. You can freeze the leftover cupcakes and buttercream in ziplock bags for another occasion!
Ingredients
UnitsScale
For the cake layers:
1/4cup unsalted butter
1/3cup white sugar
1 egg
1/2 teaspoon vanilla
2 tablespoons buttermilk
1/2 tablespoon vegetable oil
2/3cup flour
1/2 teaspoon baking powder
1/4 teaspoon baking soda
pinch of salt
For the buttercream:
1/2cup unsalted butter at room temperature
1 1/2cups powdered sugar
pinch of salt
1/4 teaspoon vanilla extract
2 teaspoons cream or milk
optional for fillings: dulce de leche or caramel, crushed freeze dried strawberries, lemon curd, jam, or crushed Oreo cookies (1/2 tablespoon of each)
Instructions
To make the cake layers:
Using an electric mixer (ideally handheld, since the quantities are so small), beat room temperature butter and sugar on medium speed until pale and creamy, about 2 minutes. Scrape down to the bottom of the bowl once during mixing to make sure no butter or sugar is stuck at the bottom.
Add egg and vanilla, mixing on the lowest speed for about 30 seconds, until incorporated.
Add room temperature buttermilk and oil and mix on low speed to incorporate.
In a bowl sift flour, baking soda, baking powder and salt. Pour into the mixing bowl and mix on lowest speed to incorporate, scraping down to the bottom of the mixing bowl to check that batter is evenly mixed.
Line 6 cups of a cupcake pan with wrappers and divide batter between them. I like to use a cupcake scoop for this!
Bake at 175ºC or 350ºF for 15 minutes or until the cupcakes spring back up when you poke them.
Leave cupcakes to cool in the pan for 10 minutes before lifting them out.
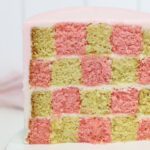
Unwrap the cupcakes and cut each cupcake in half horizontally to make two layers. You'll need five cupcakes to make 10 cake layers, of which you'll use 9 to make three 3-layer mini cakes.
To make the buttercream:
Sift the sugar to remove any lumps and check that the butter is at room temperature - you should be able to slice through it easily with a spatula.
With an electric mixer (preferably handheld, since the quantities are too small to reach effectively with a stand mixer), mix butter for a few seconds until smooth. Add the powdered sugar and salt and mix on the lowest speed until incorporated, about two minutes.
Add vanilla and mix until it's combined with the buttercream.
To make flavoured fillings, scoop up about half a cup of buttercream and divide between three small bowls. Add 1/2 a tablespoon of any filling to each bowl (e.g. dulce de leche or caramel, crushed freeze dried strawberries, lemon curd, jam, or crushed Oreo cookies). Stir to check the consistency and if it's too stiff, add a few drops of milk until it's easy to stir. Note: if you're using liquid filling ingredients e.g. caramel, the consistency will probably be perfect without adding milk! For dry ingredients e.g. cookie crumbs or crushed freeze dried strawberries you'll probably need to add milk.
Check the consistency of your main bowl of frosting and add more milk or cream a tablespoon at a time until the buttercream is smooth and easily stirred.
To make a mini cake:
Spread or pipe a blob of buttercream onto the middle of a cake board at least 4 inches wide and press the first cake layer down onto it to attach it.
Buttercream can be spread or piped onto the cake as a filling but for runny fillings like jam, curd, caramel etc you'll need a buttercream dam. Pipe a ring of buttercream around the edge of the cake layer to act as a wall and then spoon your filling inside.*
Repeat with the next cake layer and filling and then place the final cake layer on top.
Put the cake into the freezer for 15 minutes or the fridge for 30 minutes to set the buttercream.
Cover the cake with a thin layer of buttercream as a crumb coat. This is easiest to do by piping it onto the cake (I like to do zig zags around the cake) and then spreading it. When it's fairly smooth put the cake back into the fridge or freezer for 15-20 minutes.**
Decorate the mini cakes following the steps in the tutorial!
Notes
* For the Easter egg mini cake, place the bottom cupcake upright and the next two upside down to make the rounded shape of an egg. For the Easter bunny and chick, place the top cupcake upside down to make the rounded shape of the head. (Place the bottom two cupcakes however you like!)
**For the Easter egg mini cake, use a serrated knife like a bread knife to carve the mini cake into an egg shape after chilling the cake, before spreading on the crumb coat.
I'm so glad you're signing up for my newsletter! You're sure to find loads of caking inspiration and learn from the tips and tricks I've discovered throughout my career!
Want to learn more?
Get immediate access to my FREE course on 10 Frosting Techniques and my newsletter with loads of caking inspiration, tips and tricks!